Resource Packs
Resource Packs can heavily change the way your server looks, and with RoseChat these can be used in chat too.
If you are unsure how to create a resource pack, there are plenty of tutorials online. This is a text-based tutorial from the Minecraft Wiki, if you prefer video tutorials, you can use YouTube tutorials to get started.
Once you have a resource pack created, you should create another folder in the assets folder. This is to keep your files more organised, content for RoseChat will go in this folder.

After this, a folder called textures is needed inside it.

Your emojis/icons should go in this folder. Note: The maximum size for these is 256x256.

Then, navigate back to your assets folder. Enter the minecraft folder, or create it if it does not exist.
Enter the font folder, or create it if it does not exist.
A file called emoji.json needs to be created, the name of this file will be the name of the font. This is also the name used for the font in RoseChat's emojis.yml
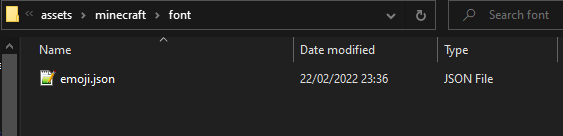
As this is a json file, it may be easier to use a Json Validator such as JSONLint to make sure your file is formatted correctly.
At first, you should copy this into the file. This tells Minecraft what will be providing the font.
{
	"providers": [{
		"type": "bitmap",
		"file": "rosechat:rosewood.png",
		"ascent": 8,
		"height": 8,
		"chars": [
			"\uE000"
		]
	}]
}
The type, tells Minecraft that the font uses bitmap images. This means you can use one image per character.
The file tells Minecraft which file to use, you should use the name of the folder you created instead of "rosechat", and your image file instead of "rosewood.png", the file extension is needed.
The ascent, is how high up from the line the symbol should be. This cannot be bigger than the height.
The height is the size of the image.
The chars are the unicode numbers of the character to use. Every instance of these characters, using this font, will be replaced. When using this in RoseChat, defining the font is easy and won't cause any issues. However, if you intend to use the resource pack elsewhere, or decide to edit the "default" font, you should be careful of which characters you use. This is because players who speak different languages may have some of their characters changed. We recommend using characters from the Private Use Area section of unicode. This are characters from \uE000 to \uF8FF, specifically reserved to be used like this.
The final step is to tell RoseChat to use this character. In emojis.yml, you can just provide the font and character as a replacement. For example:
rosewood:
  text: ':rosewood:'
  replacement: "\uE000"
  hover: '&b&o:rosewood:'
  font: "emoji"
This tells RoseChat to replace all instances of :rosewood: with the \uE000 character and the emoji font. This character will have been changed by the resource pack and therefore should show the image in-game, like this:

To use an emoji as a prefix you must follow the steps above and create a new emoji in emojis.yml, once this is done, you can use placeholders.yml to tell the plugin where the emoji should be seen. For example:
prefix:
  text:
    default: ":admin-prefix:"
After adding {prefix} to a format, this will display the emoji wherever you decide.

This, is an example of a shader:

Shaders are currently not supported, but will be in the future. As of now, colours can be used to display shaders when using a resource pack.
Custom shaders are a very complex topic, and requires knowledge of GLSL shaders. There's not much information related to text shaders, but this guide, created by our developer Lilac, may help you create text shaders.