A fully customizable, Arduino-based, multi-frequency intermittent wiper controller for classic British cars with single-speed Lucas DR2 wiper motors. This controller is non-destructive and fully reversible, requiring no modifications to the original vehicle.
Some classic British cars such as the MG MGA and Triumph TR2 came equipped with a single-speed Lucas DR2 wiper motor. When encountering rain of various intensity, the single speed is just not appropriate 90% of the time. This project provides an intelligent controller that adds intermittent wiper functionality without modifying the original vehicle or requiring additional switches.
- Non-destructive installation - No modifications to the original vehicle
- Uses factory switch - No need for additional controls or multi-position switches
- Multiple intermittent speeds - Four configurable delay settings plus continuous mode
- Intuitive control - Quick ON-OFF-ON toggles to cycle through speeds
- Compact design - Small SMD-based PCB fits under the dashboard
- Arduino-based - Easy to program and customize
- Fully reversible - Can be removed and wiring restored to factory configuration
The Lucas DR2 wiper motor found in many classic British cars from the 1950s and 1960s operates at only a single, continuous speed. When driving through light rain at moderate/slow speeds, this continuous wiping motion is often too frequent. Many drivers end up manually switching the wipers ON and OFF repeatedly to achieve the desired intermittent wiping - this project automates that process.
The factory wiper system has three terminals:
- Terminal 2: Continuous +12V power
- Terminal 1: Ground connection via dashboard switch
- Terminal E: Auto-parking ground connection
When the dashboard switch grounds terminal 1, the motor starts. The motor continues running via terminal E until the wipers return to their parked position, regardless of the switch position. If the switch is still closed when parked, wiping continues; otherwise, the motor stops.
This controller sits between the original dashboard switch and the wiper motor, interpreting the switch position to provide multiple intermittent wiper modes. The driver uses quick ON-OFF-ON toggles of the original switch to cycle through different intermittent speeds.
The controller provides five operating modes:
- Intermittent 1: Wipes every 10 seconds (slowest)
- Intermittent 2: Wipes every 7.5 seconds
- Intermittent 3: Wipes every 5 seconds
- Intermittent 4: Wipes every 2.5 seconds
- Continuous: Original single-speed operation (fastest)
- Activate wipers: Pull the switch ON to start wipers at the slowest intermittent setting
- Increase speed: Quickly toggle the switch OFF then ON (within 2 seconds) to advance to the next faster setting
- Turn off wipers: Push the switch OFF and hold for more than 2 seconds to deactivate and reset
- Next activation: Always starts at the slowest intermittent setting after a reset
The controller consists of three main sections:
- Power Regulation: 12V to 5V conversion for microcontroller operation
- Microcontroller: ATtiny85 running Arduino framework code
- Relay Driver: High-current relay to control the wiper motor (5-10A capability)
| Component | Part Number | Description | Quantity |
|---|---|---|---|
| Microcontroller | ATtiny85-20SU | 8-bit MCU, 8K Flash, Arduino compatible | 1 |
| Voltage Regulator | LM2931DT-5.0G | 5V 100mA LDO with load dump protection | 1 |
| Relay | V23076A1001C133 | Automotive power relay | 1 |
| Transistor | BC846BLT1G | NPN transistor for relay driver | 1 |
| Optocoupler | SFH6186-3T | Isolation for switch input | 1 |
| Component | Part Number | Description | Quantity |
|---|---|---|---|
| Ferrite Beads | FBMJ2125HS420-T | 0805 42Ω current chip bead | 2 |
| Rectifier Diodes | CGRTS4007-HF | 1000V 1A SMD rectifier | 2 |
| Zener Diode | SZMMSZ33ET1G | 33V 0.5W voltage regulator | 1 |
| C1 | C0603C473K3RACTU | 0.047µF 25V X7R 0603 | 1 |
| C2 | CGA4J1X7S1E106K125AC | 10µF 25V 0805 | 1 |
| C3 | GRM21BC71C106KE11L | 10µF 16V X7S 0805 | 1 |
| C4 | 35ZLH100MEFC6.3X11 | 100µF electrolytic capacitor | 1 |
| C5, C6 | C0603C104K3RAC3190 | 0.1µF 25V X7R 0603 | 2 |
| R1 | CRGP2512F470R | 470Ω 1% 2512 SMD | 1 |
| R2, R3 | ERJ-3EKF1002V | 10kΩ 1% 0603 | 2 |
| R4 | ERJ-3EKF1001V | 1kΩ 1% 0603 | 1 |
| Component | Part Number | Description | Quantity |
|---|---|---|---|
| J1-J4 | 7799 | M4 screw terminals | 4 |
| J5 | 10129381-906004BLF | 2×3 ISP programming header | 1 |
The PCB uses primarily SMD components to minimize size and was designed to potentially mount directly to the wiper motor housing. The final implementation installs under the dashboard where it remains virtually invisible while maintaining the stock appearance of the vehicle.
PCB Specifications:
- Compact two-layer design
- SMD components (0603/0805) where possible
- Through-hole components for high-current connections
- ISP programming header for easy firmware updates

The controller is housed in a two-part snap-fit enclosure designed in Fusion 360. Originally intended to mount on the wiper motor housing, the final installation places it under the dashboard for easier access and installation.
The controller is programmed using the Arduino framework with the ATtiny85 core. The code implements:
- Switch debouncing in software (50ms delay)
- Non-blocking timing using
millis()instead ofdelay() - Toggle detection to cycle through intermittent speeds
// I/O Configuration
#define PIN_WIPER_OUTPUT 3          // Relay control pin
#define PIN_INPUT_SWITCH 4          // Dashboard switch input pin
#define SWITCH_DEBOUNCE_DELAY_MS 50 // Debounce delay
#define TOGGLE_LIMIT_DELAY 2000     // Max time for toggle detection

// Intermittent Delays
#define INTERMITTENT_1_MS 10000     // 10 seconds
#define INTERMITTENT_2_MS 7500      // 7.5 seconds
#define INTERMITTENT_3_MS 5000      // 5 seconds
#define INTERMITTENT_4_MS 2500      // 2.5 seconds

// Motor Control
#define RELAY_TIME_MS 500 // Relay activation durationThe software consists of two main functions:
- Reads the dashboard switch state
- Implements software debouncing
- Detects state changes (ON→OFF, OFF→ON)
- Tracks toggle sequences to determine mode changes
- Executes wiper control based on current mode
- Manages timing for intermittent delays
- Controls relay activation/deactivation
The intermittent delays can be easily customized by modifying the INTERMITTENT_X_MS definitions. The values are in milliseconds, so adjusting them to your preference is straightforward.
The controller installs inline between the original wiring harness and the wiper motor:
Input (from vehicle harness):
- J1: Ground from dashboard switch
- J2: +12V power
- J3: Parking switch connection
Output (to wiper motor):
- J3: To motor terminal 1
- J2: To motor terminal 2 (through controller)
- J4: To motor terminal E


The ATtiny85 can be programmed via the ISP header (J5) using:
- USBasp programmer
- Arduino as ISP
- Other AVR programmers supporting ISP protocol
Flash the provided Arduino sketch to the ATtiny85 using the ISP connector on the PCB.
- Disconnect the battery negative terminal
- Locate the wiper motor and disconnect the original three-wire connector
- Connect the controller inline between the harness and motor
- Mount the controller under the dashboard using zip ties or mounting brackets
- Reconnect the battery and test operation
After installation, verify operation:
- Power on: Pull the wiper switch - wipers should activate in slowest intermittent mode
- Toggle test: Quickly switch OFF then ON - wipers should advance to next speed
- All modes: Cycle through all five modes to verify each speed
- Reset: Hold switch OFF for 3+ seconds, then reactivate - should start at slowest speed
- Parking: Turn off in any mode - wipers should return to parked position
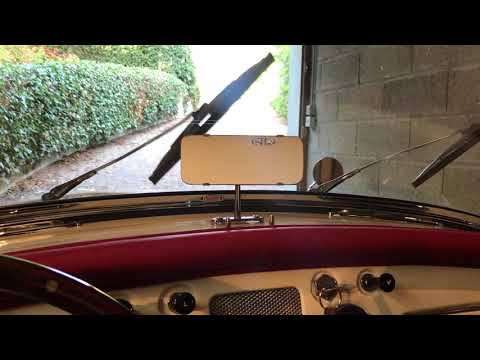
The controller has been successfully tested and installed in an MG MGA. Key observations:
- Reliable operation: No false triggers or missed toggles
- Proper timing: All intermittent delays work as programmed
- Original functionality preserved: Can be removed without trace
- Invisible installation: Maintains stock appearance
All project files are available in this repository:
PlatformIO/- Arduino source codeEagle/- Schematics, PCB layouts (+Gerber files)Enclosure/- 3D printable enclosure designs (STL/STEP files)
Complete BOM with supplier part numbers is available in the Eagle/BOM_Wiper_Control.pdf file. All components are readily available from Mouser Electronics and other major suppliers.
- Classic car with Lucas DR2 or similar single-speed wiper motor
- Original single-pole ON-OFF wiper switch
- 12V electrical system
- Arduino IDE or PlatformIO
- ATtiny core support (install via Board Manager)
- AVR programmer with ISP support (USBasp or Arduino ISP programmer)
- 6-pin ISP cable
Every aspect of this design prioritizes reversibility:
- No cutting or drilling of original components
- No permanent wiring modifications
- No changes to dashboard or switch
- Controller can be completely removed, returning vehicle to factory specification
The design accounts for the harsh automotive environment:
- Load dump protection in voltage regulator
- Automotive-grade relay rated for motor inrush current
- Ferrite beads for EMI suppression
- Proper wire gauge for current handling
- Relay rated well above motor current draw
- Fused power connection recommended
- Isolated optocoupler for switch input
- Zener diode for voltage spike protection
This controller is designed for the Lucas DR2 wiper motor but should work with any single-speed wiper motor that uses a similar three-wire configuration with auto-parking functionality. Confirm your motor's wiring matches before installation.
Known compatible vehicles:
- MG MGA (1955-1962)
- Triumph TR2 (1953-1955)
- Triumph TR3 (1955-1962)
- Other British cars from the 1950s-1960s with Lucas DR2 motors
Contributions are welcome! If you've installed this controller in a different vehicle or made improvements to the design, please submit a pull request or open an issue.
This project is licensed under the Creative Commons Attribution-NonCommercial-ShareAlike 4.0 International License (CC BY-NC-SA 4.0).
- Share — copy and redistribute the material in any medium or format
- Adapt — remix, transform, and build upon the material
- Attribution — You must give appropriate credit, provide a link to the license, and indicate if changes were made
- NonCommercial — You may not use the material for commercial purposes
- ShareAlike — If you remix, transform, or build upon the material, you must distribute your contributions under the same license
✅ Allowed:
- Personal use and modifications
- Educational purposes
- Sharing with the classic car community
- Building your own controller for your vehicle
- Sharing improvements and modifications
❌ Not Allowed:
- Selling the controller or kits commercially
- Manufacturing for profit
- Including in commercial products or services
- Using the design in commercial automotive products
Full License: CC BY-NC-SA 4.0
- MGAGuru for excellent wiper motor documentation
- Arduino community for ATtiny85 core support
- Hackaday.io community for feedback and encouragement
Created by F. Lidove for the classic car community.
Hackaday.io Project: https://hackaday.io/project/175605-classic-car-intermittent-wiper-motor-controller
This modification involves working with automotive electrical systems. While designed to be safe and reversible, improper installation could potentially damage your vehicle's electrical system. Install at your own risk. The author assumes no liability for any damage resulting from the use of this design.
Always disconnect the battery before working on automotive electrical systems.
For questions, issues, or discussions:
- Open an issue on this GitHub repository
- Comment on the Hackaday.io project page
Enjoy safer driving in light rain with your classic British car!