User Interface
note: click on any of the images to view full size
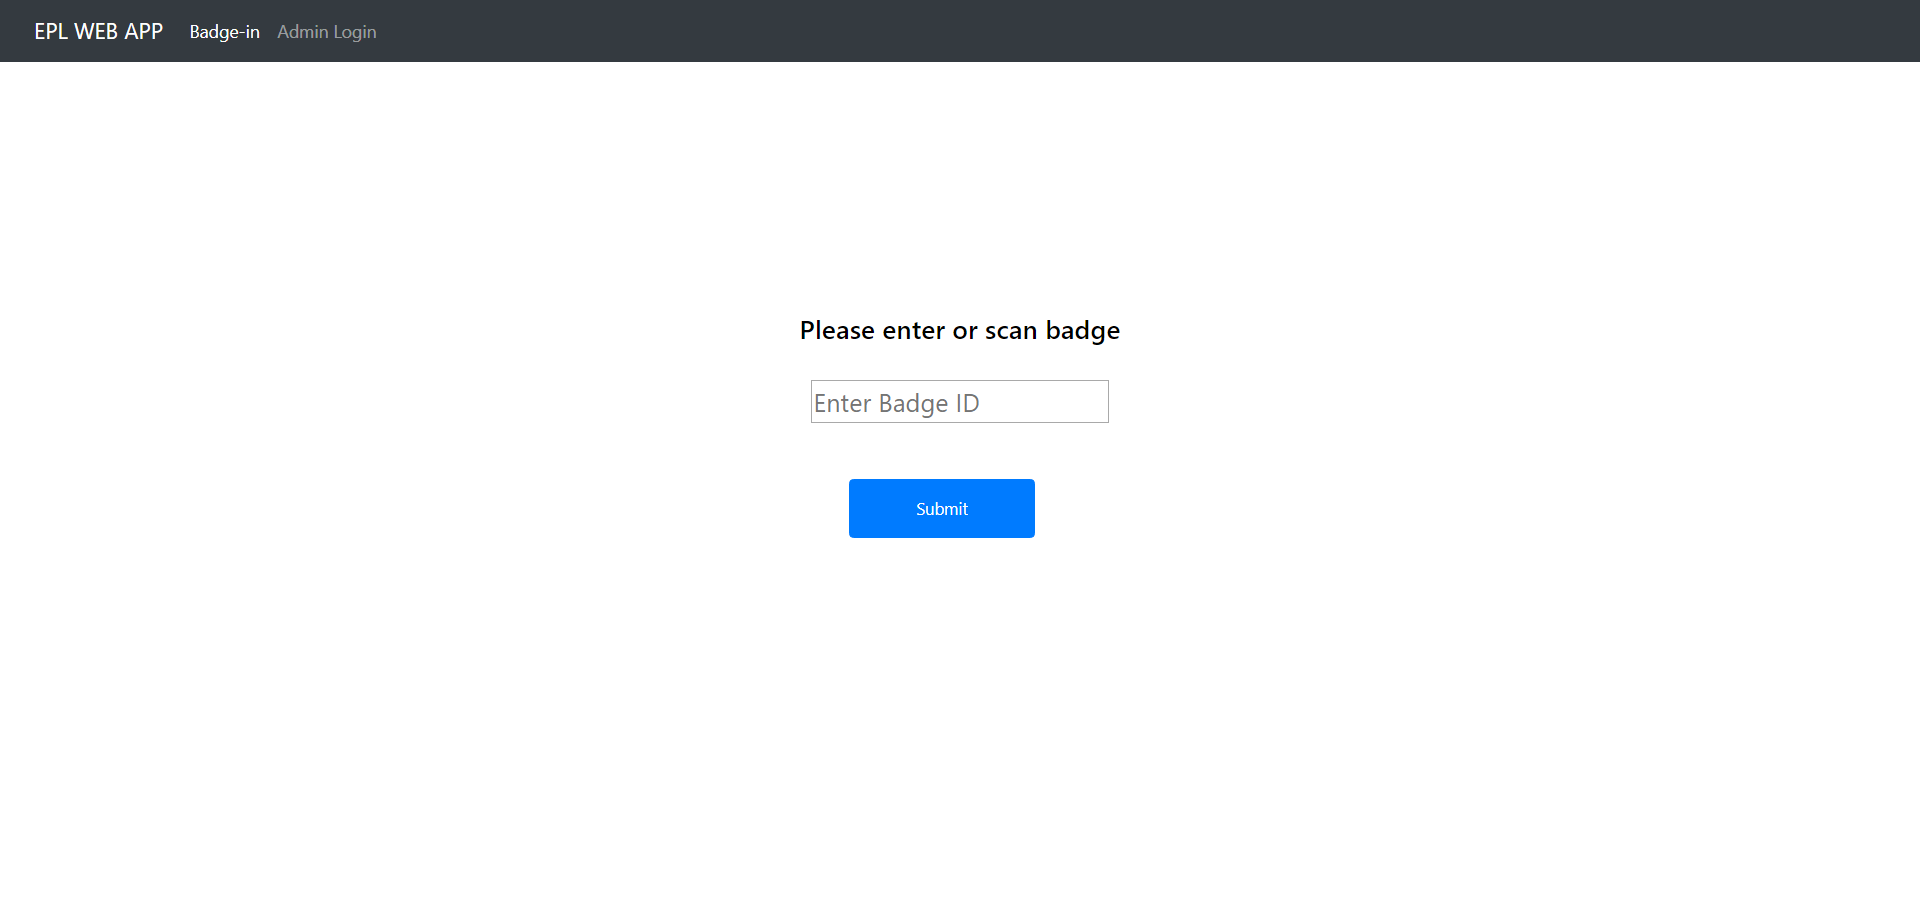
When you start up the application and navigate to the website, this is going to be the first page that you are greeted with. The purpose of this page is so that users of the lab have a way of "logging" into and out of the lab. Logging into the lab allows you to be able to go use various stations in the lab (if you are trained to use those stations). This whole process occurs when you are a registered member of the lab. If you are not a registered member of the lab and you try to badge-in then you will be redirected to the user registration page.
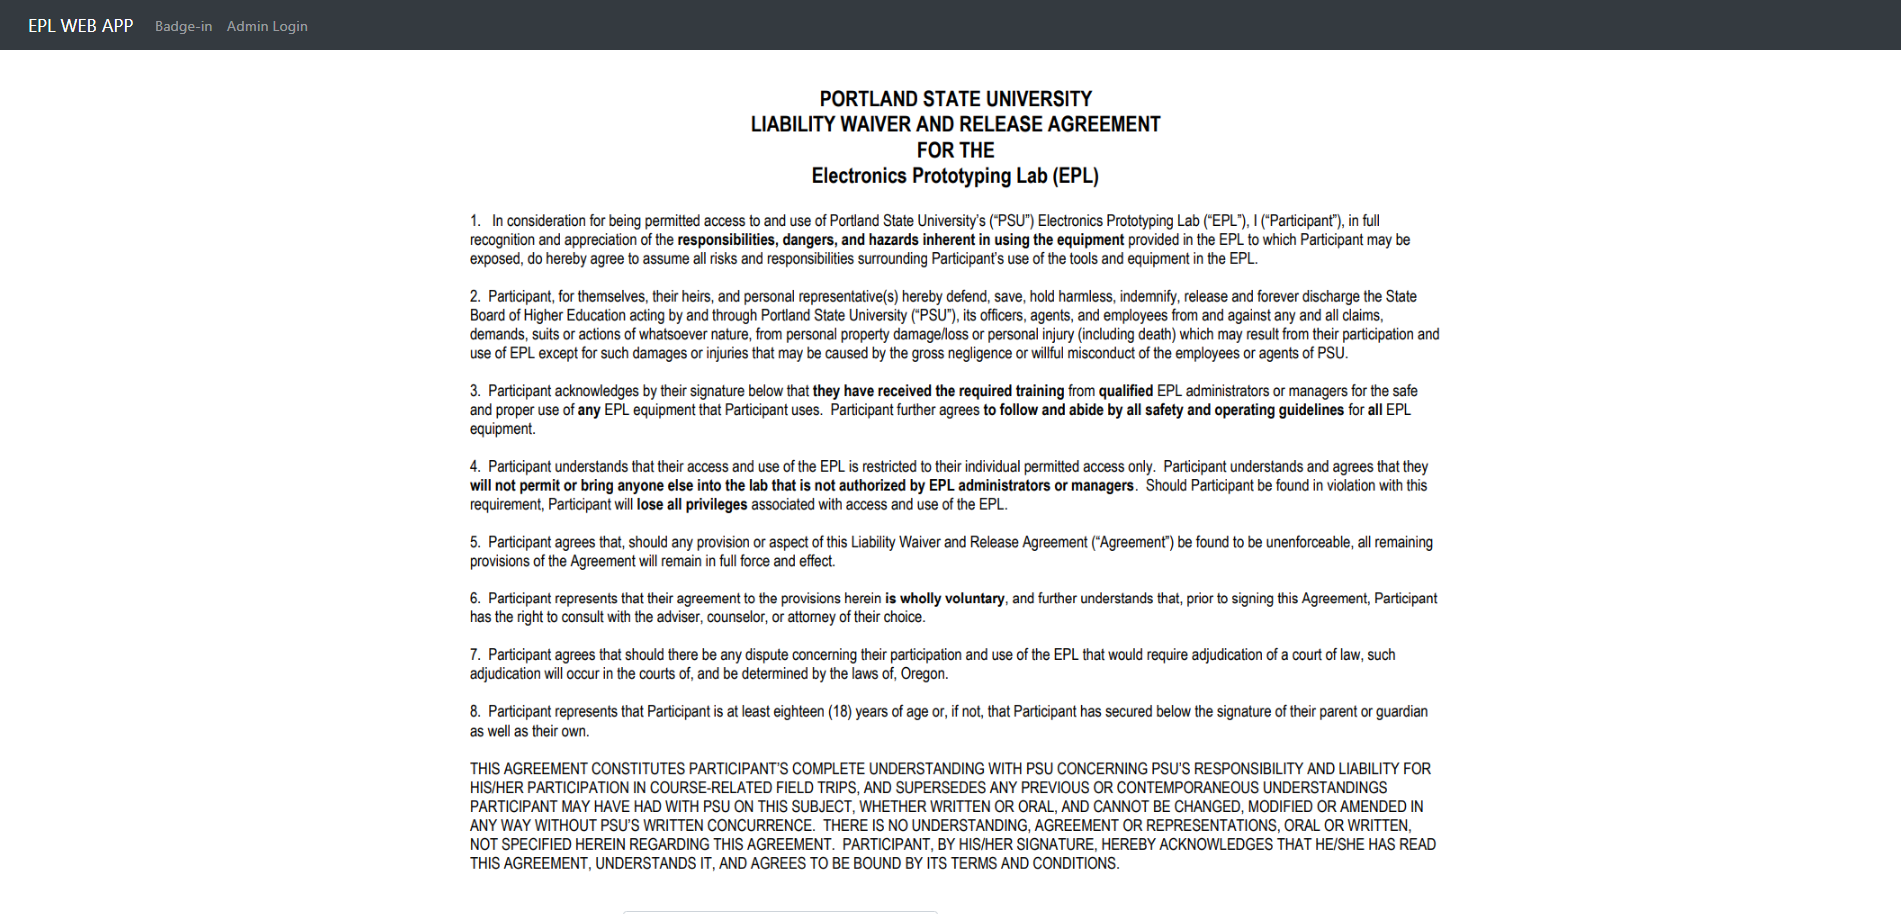
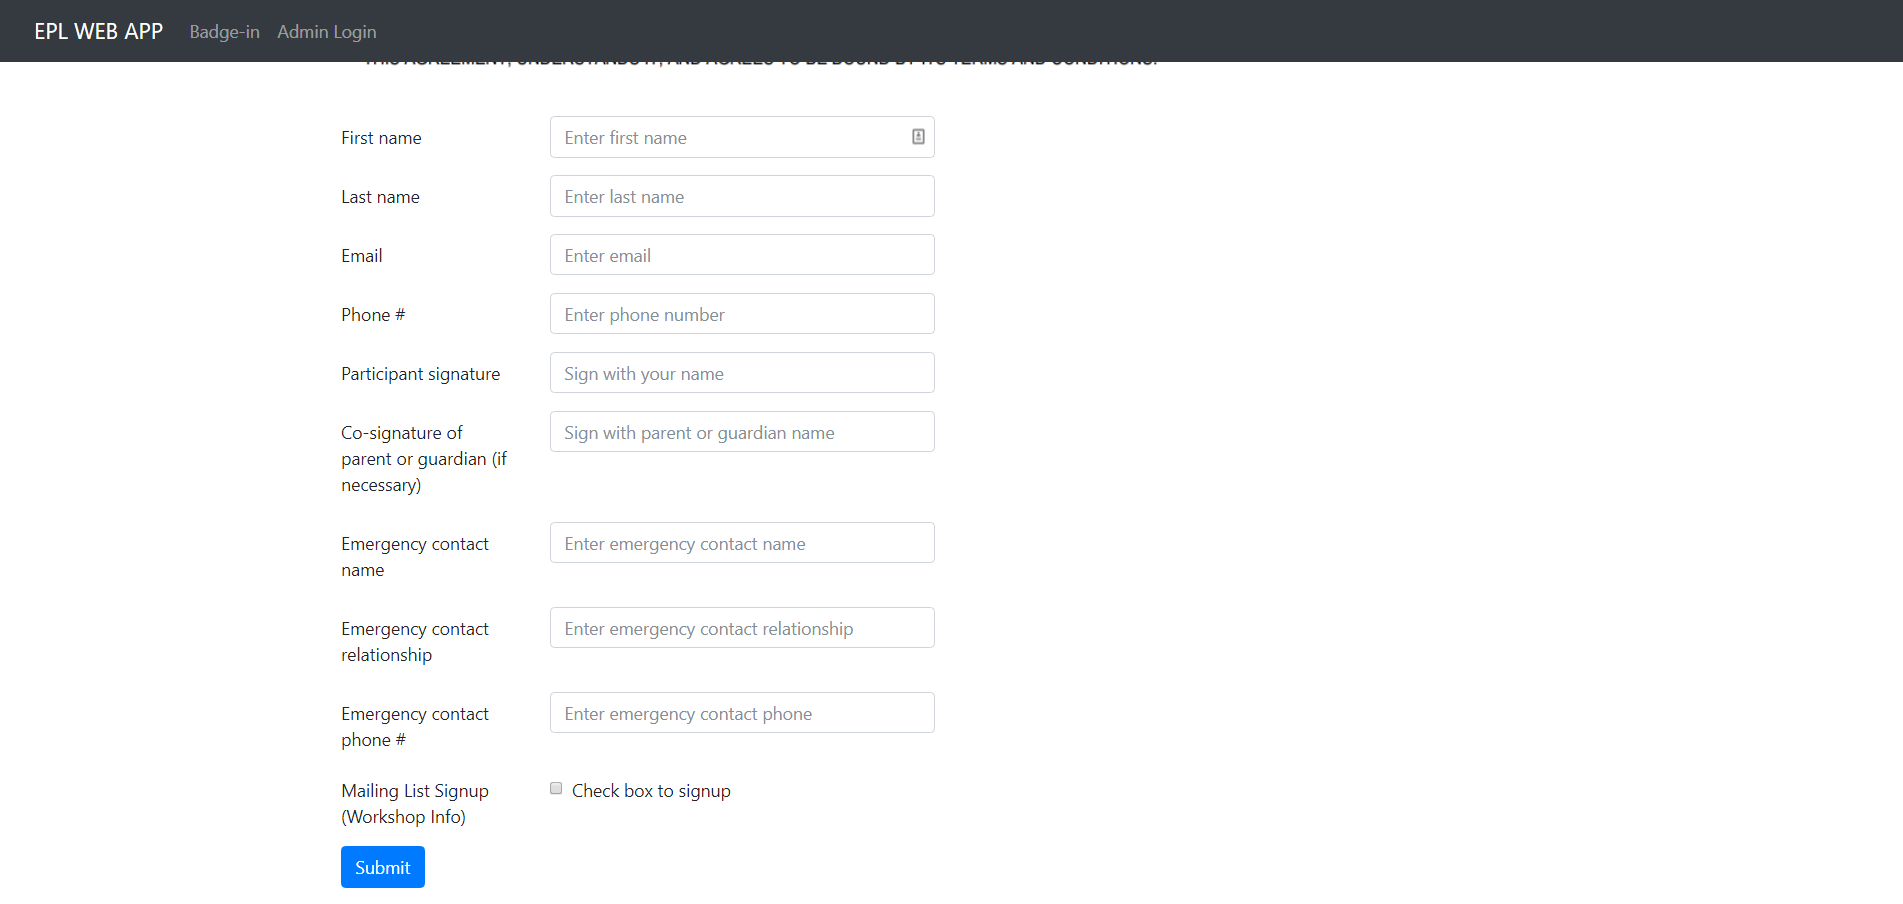
This page includes a user liability form that the user should go over. In this registration page you will be able to create a user account that permissions can be granted to use various stations in the lab. The fields to fill out are fairly self explanatory. Once you are done filling in the fields, you can submit your registration form and user with that information will be created. You will be redirected back to the badge-in page where you can then badge into the lab, but you will not have any permissions to use any of the stations. You will need to ask an administrator to grant you privileges.

This is the page where an administrator will log in from. Logging in will start a session so make sure to log out once you are done. Once you have seeded the database a default admin is created which you can use to initially log in as. On a successful login you should be redirected back to the badge-in page The email and password are as follows.
   Email:  admin@admin.com
Password:  imtheboss
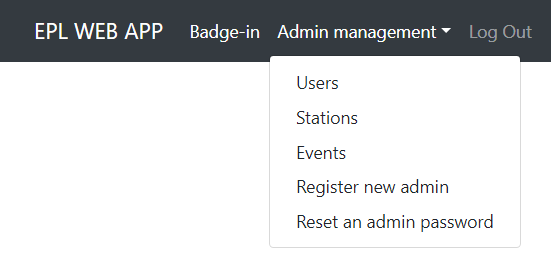
Once you are logged into the system as an admin you will notice that the navigation bar has changed. Next to the badge-in link there should be a dropdown for various pages related to administrator critical activities, and a log out button (do not forget to log out!)
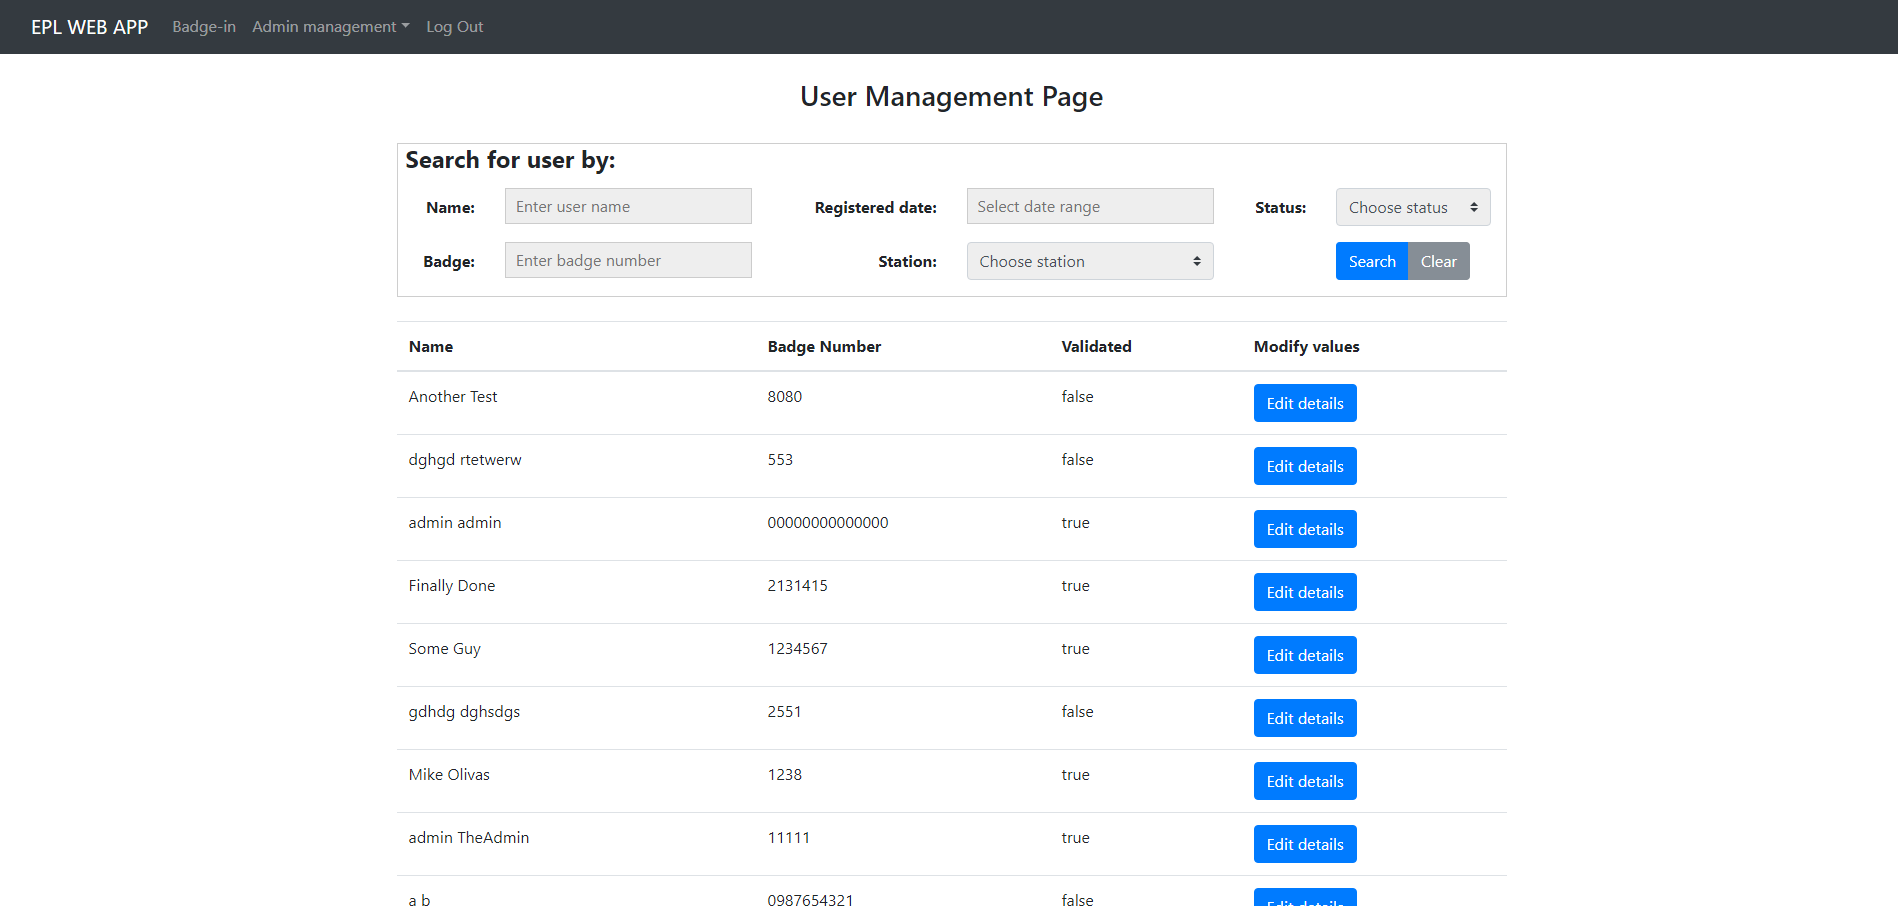
The user management page list all the current users that have registered through the user registration page. At the top of the user management page there is a search form which you can use to filter users by. The search form includes being able to filter users by: name, badge, registration date, status (all, user, manager, status), and by stations (users that have privilege to use a particular station). Once you are done entering and selecting information you would like to filter by, click "Search" and the users that match that criteria will be displayed. To clear your search click "Clear". If you would like to get more detailed information about a particular user in the list click the "Edit" button associated with that particular user in the list and you will be redirected to that users page.
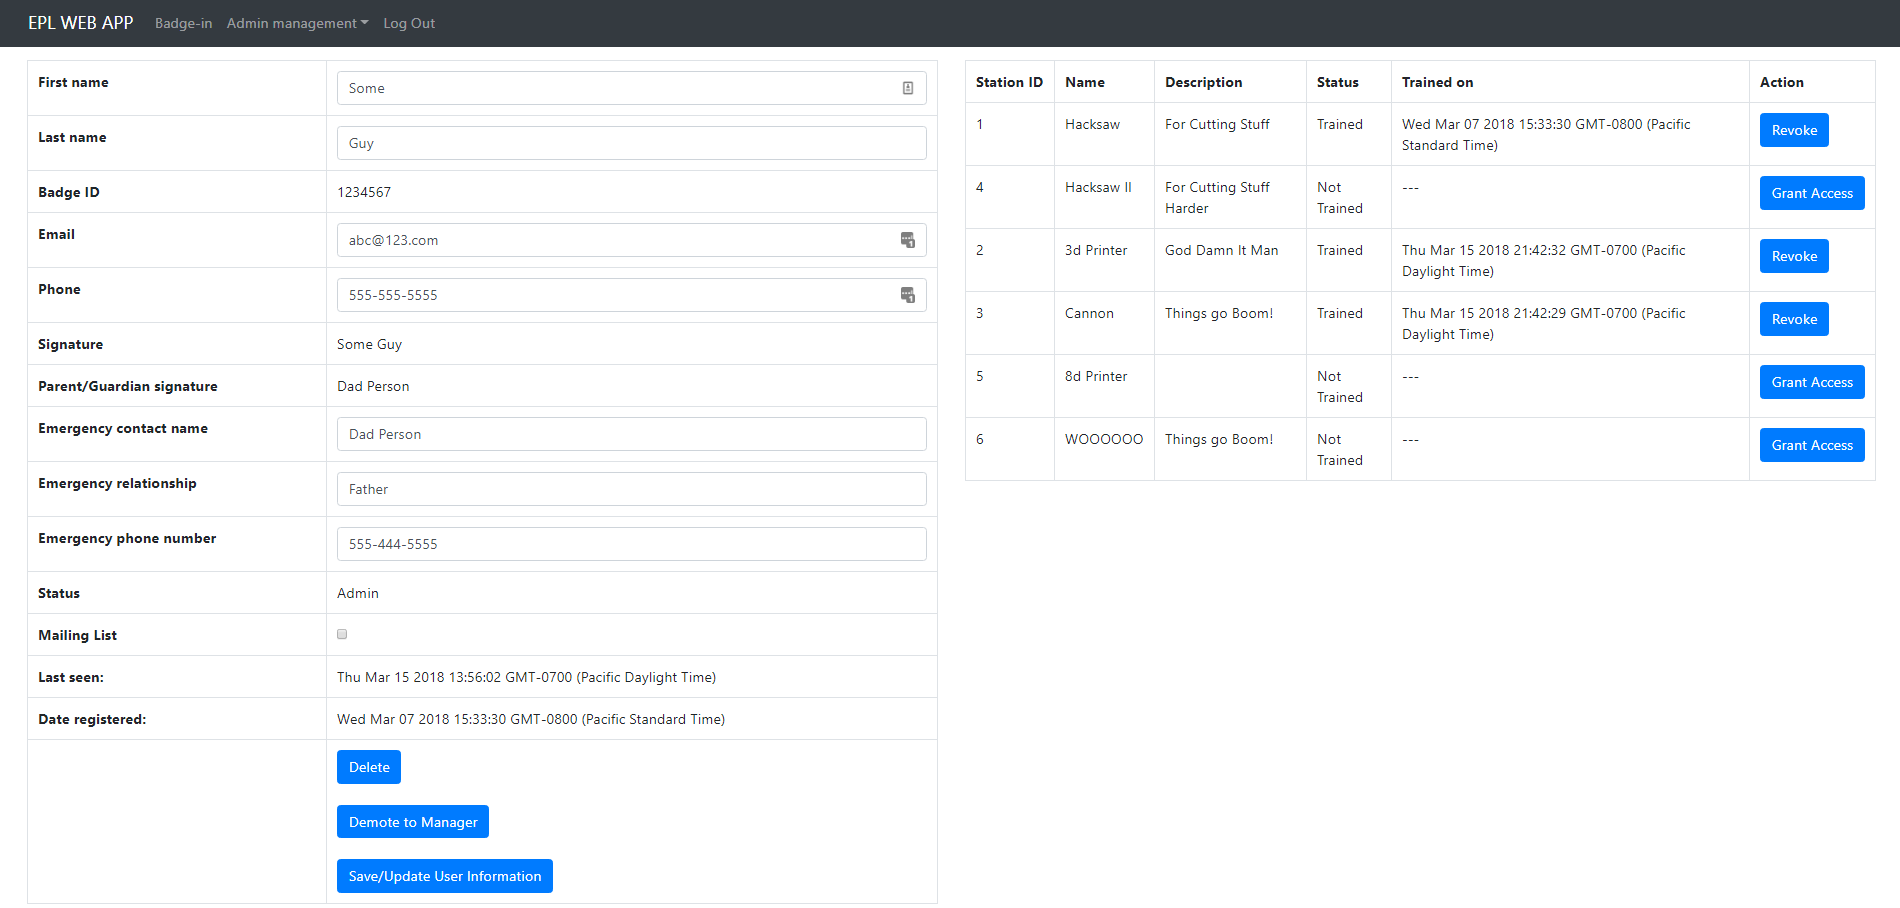

The individual user management page is split up into 3 section. The section on the left of the page provides all the user information that has been collected when the user has registered. When a user first registers you will see a "Validate" button on the UI, clicking this button indicated that you as the admin have reviewed this users information and deemed it legitimate. You are able to modify any of the editable input fields and then saving your changes by clicking "Save/Update User Information". You are able to completely delete a user by clicking "Delete" as well as changing a users status by clicking "Promote to Manager" is their status is "User". Then "Demote to User" if they are "Manager" status. As well as "Demote to Manager" if they are "Admin" status.
The section to the right is the administrator privilege control section. This section displays all the current stations that are in the system. This section allows an admin to control the access a user has to various stations by granting or revoking access. The list will display if the user was trained on a particular station and at what date they were trained/granted access.
The section below is the table of all events that are associated with that users badge ID. For more information about the events log please refer to the "Events Log Page" section below.
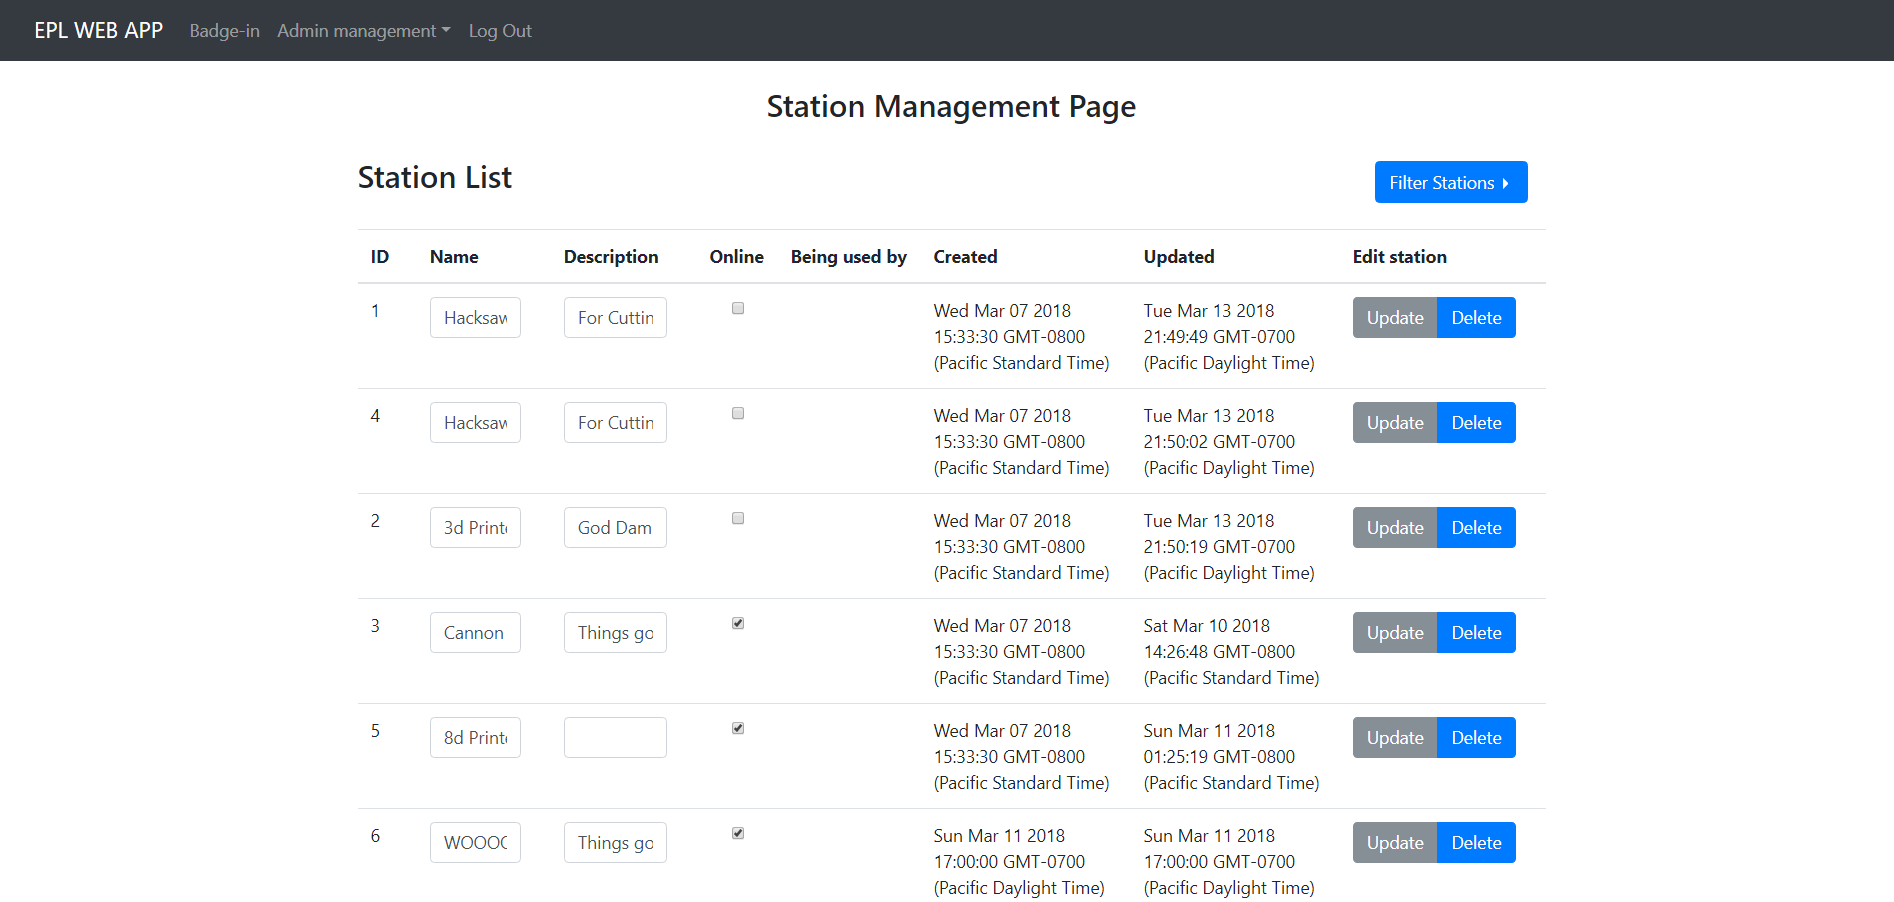
The station management page includes a table of all the current stations on the network that are communicating with the LUCCA server. You can filter stations that are online and offline by clicking the "Filter Stations" dropdown and selecting desired choice. Users will not be able to use stations that are marked offline. From this page you are able to change the station name, description, and whether the station is online. Once you have made your changes do not forget to click "Update" for that station to ensure your changes are saved. To delete a station from the list click "Delete". A deleted station which is still sending a heartbeat to the server should reappear in the list and be marked offline. If a station is being used by someone it will display the users information for that station in the list (Full name and badge ID).

The events log page shows a log of all the events that happen within the application sorted by date. These events fall into one of the following five "event classes": user traffic, privilege, administration, station, internal error. The events log page table also has an entity column, the context of the entity column depends on the event class and is as follows for each event class respectively: user badge ID, modified user badge ID, admin responsible badge ID, station ID, error location (function name or whatever is relevant). Each event will also have a message associated with it providing more detail about the event as well as a date on which that event was created. To filter by specific event classes click the "Filter by event" dropdown and select the event class to filter by.
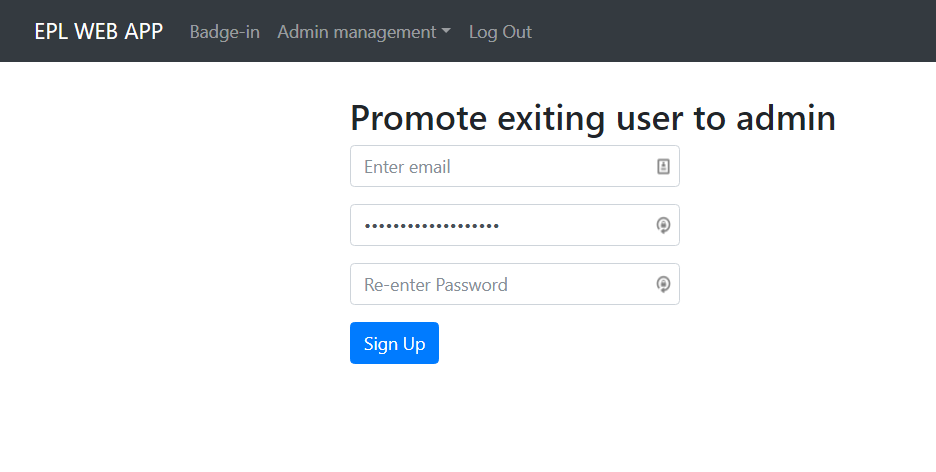
At this page you will be able to register a new admin. This page is only accessible when an existing admin has logged in. You will need to make sure the user your are registering has already a user account created through the user registration page. You will need to provide the users email address, and have them input their desired password. Once this is done click "Sign Up". Clicking this will log out the currently logged in admin, and redirect you to the admin login page where you or the newly created admin can log in again.
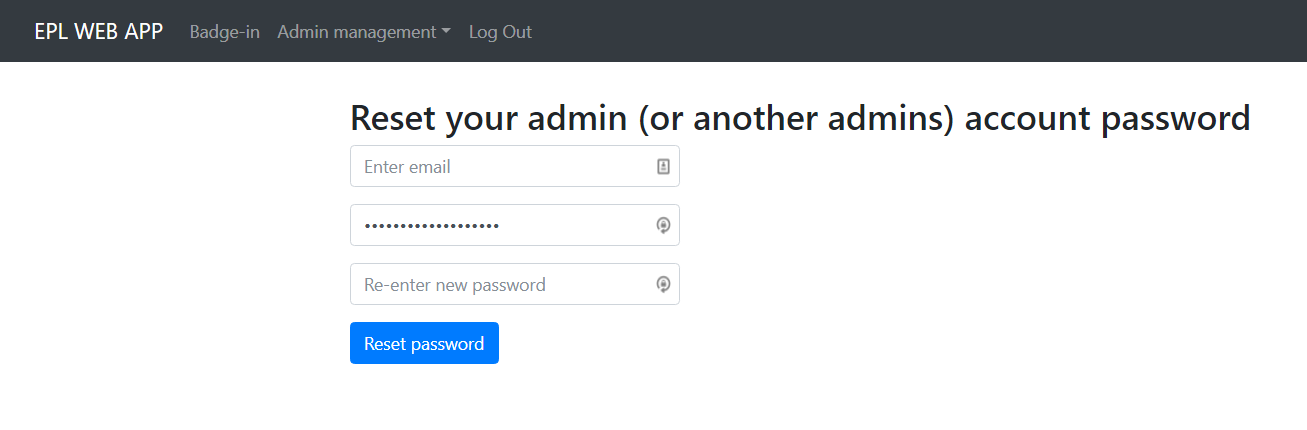
This page will allow you to reset your admin password or another admin's password. This page will require you to provide the admin's email that you wish to reset and then enter the newly desired password to change to. Click "Reset password" once you are satisfied with the chosen password. You will be logged out of the account and redirected to the admin login page.