

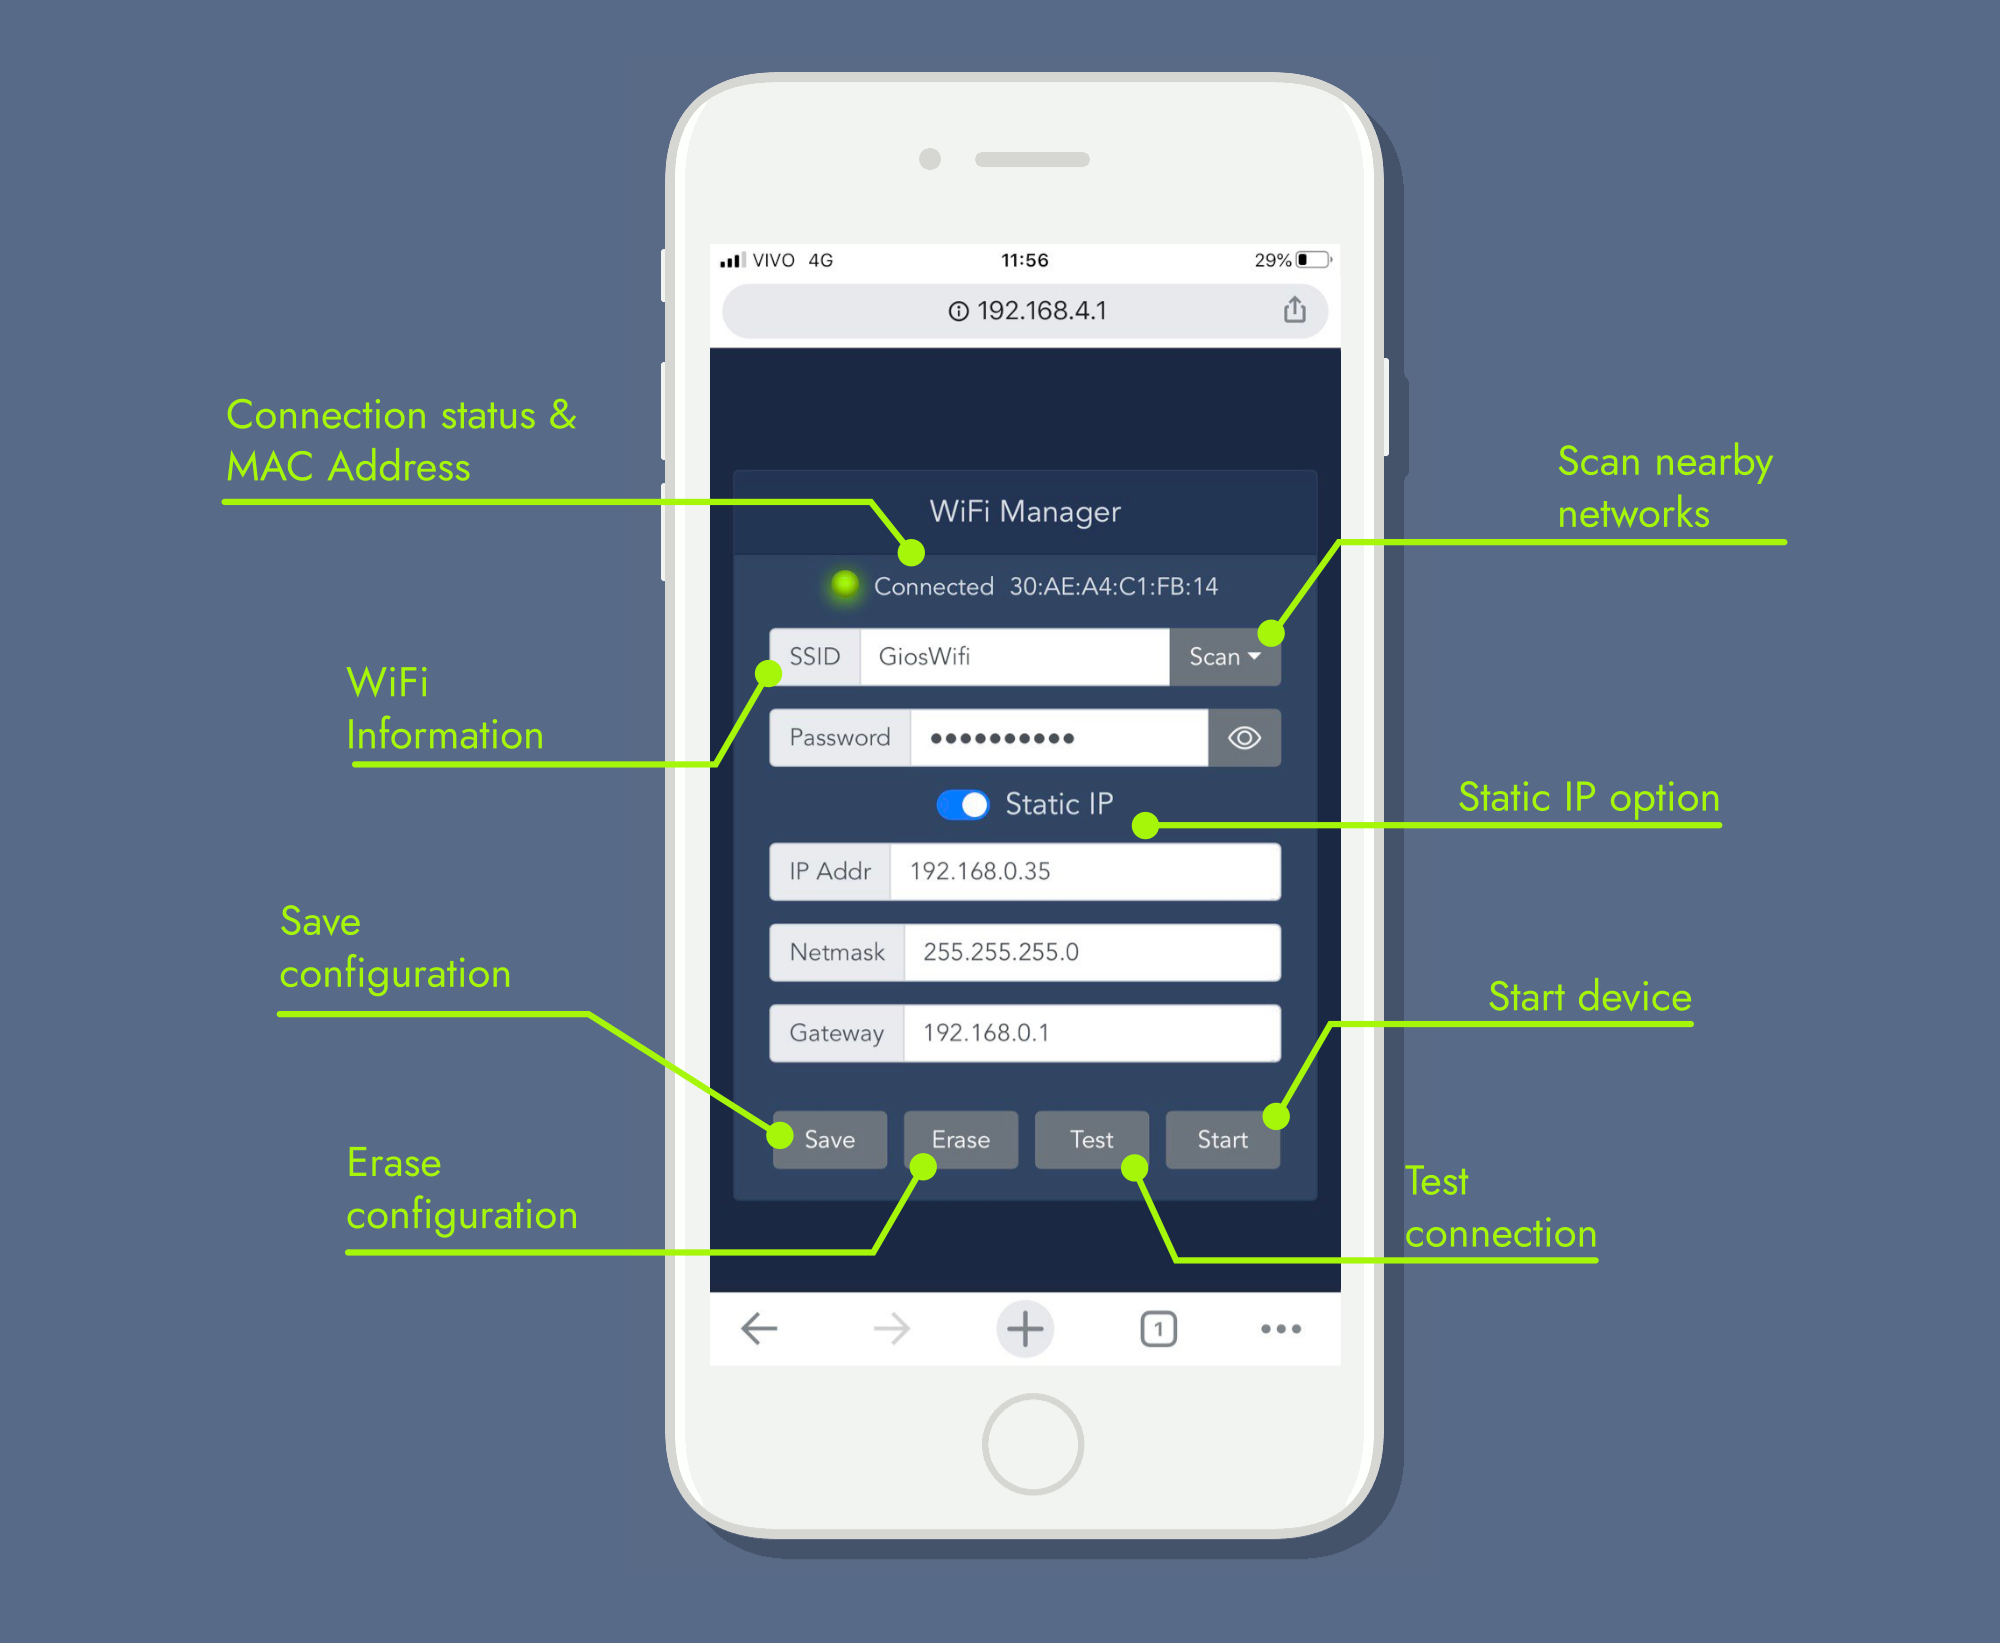
Version 2 rebuilds the original Vue.js 2 and BootstrapVue project as a small, self-contained ESP32 and ESP8266 WiFi configuration page. Its main goals are a significantly smaller flash footprint, a simpler development and deployment workflow, and an easier setup with only a few frontend dependencies. The production build bundles all HTML, JavaScript, CSS, and icons into one minified gzip file that works without an internet connection.
The new frontend uses Petite Vue and plain CSS while intentionally preserving the
original page and UI structure. Petite Vue is a lightweight distribution from the
Vue ecosystem: it uses Vue 3's @vue/reactivity package and provides familiar
Vue-compatible directives such as v-model, v-if, v-for, and @click, without
shipping the complete Vue runtime or a large component library such as
BootstrapVue.
For easier maintenance, the webpage source is now separated into
web-app/index.html for markup, web-app/src/app.js for application behavior,
and web-app/src/style.css for styling. These files remain separate during
development and are combined into one self-contained HTML file by the production
build.
Requirements: Node.js 18 or newer and npm.
cd web-app
npm install
npm run dev
The development server uses a built-in mock device by default, so scanning, saving, erasing, testing, and starting can be exercised without hardware.
The mock is frontend-only: when Vite runs in development mode, app.js loads a
sample device configuration instead of opening a WebSocket. Scan returns a few
sample SSIDs after a short delay, and Save, Erase, Test, and Start return simulated
success responses. It does not run an ESP server or write configuration anywhere.
Production builds always remove this mock path and use the real device WebSocket.
To connect the development page to an ESP32 or ESP8266 instead:
npm run dev:deviceThe device defaults to 192.168.4.1. Override it when necessary:
VITE_DEVICE_HOST=192.168.1.50 npm run dev:devicecd web-app
npm run buildThis command minifies and inlines Petite Vue, application JavaScript, and CSS
into one HTML document. It then creates index.html.gz in both web-app/dist/
and the PlatformIO data/ directory. No CDN or internet connection is required
by the resulting page.
Upload the SPIFFS image with:
pio run -e esp32dev --target uploadfsUploading the firmware does not upload SPIFFS. After changing the webpage, run
npm run build and then pio run --target uploadfs. A new/erased device without
this filesystem upload will report SPIFFS: mount failed when the page is opened.
Build the firmware with:
pio run -e esp32devThe esp8266 PlatformIO environment targets a NodeMCU v2 board. Build the
firmware and upload its LittleFS image with:
pio run -e esp8266
pio run -e esp8266 --target uploadfs
On ESP8266, both the web application and /deviceConfig.txt are stored in the
same LittleFS filesystem. Uploading a new filesystem image replaces its existing
contents, so uploadfs also clears any WiFi configuration previously saved on
the device. A normal firmware upload does not clear it.
The default configuration button is NodeMCU pin D5 (GPIO14), using the internal
pull-up resistor, and the status LED uses LED_BUILTIN. Connect the button between
D5 and ground so pressing it reads low.
The webpage communicates with the device through a WebSocket connection on port
9090 using the arduino subprotocol. When the page is served by the access
point, the default endpoint is:
ws://192.168.4.1:9090
Messages are either short plain-text commands or JSON objects. The connection is not encrypted, so credentials are transferred as plain text over the local device network. This could be improved in the future to make it more secure.
Immediately after a WebSocket client connects, the device sends the current configuration:
{
  "deviceInfo": {
    "macAddress": "30:AE:A4:C1:FB:14",
    "ssid": "Home WiFi",
    "password": "example-password",
    "isStaticIp": true,
    "staticIp": "192.168.0.35",
    "netmask": "255.255.255.0",
    "gateway": "192.168.0.1"
  }
}| Payload | Format | Purpose |
|---|---|---|
ping |
Plain text | Checks whether the device and WebSocket are responsive. |
scanNetworks |
Plain text | Starts an asynchronous WiFi network scan. |
testWifi |
Plain text | Tests the currently saved WiFi configuration. |
eraseConfig |
Plain text | Deletes the saved WiFi configuration from the configuration filesystem. |
deviceConfiguration |
JSON | Saves the supplied WiFi configuration to the configuration filesystem. |
startDevice |
JSON | Exits configuration mode and starts the device using its configured values. |
Save uses the following JSON payload:
{
  "deviceConfiguration": {
    "ssid": "Home WiFi",
    "password": "example-password",
    "isStaticIp": false,
    "staticIp": "",
    "netmask": "",
    "gateway": ""
  }
}
Start sends the fields currently displayed by the page under a startDevice
key:
{
  "startDevice": {
    "ssid": "Home WiFi",
    "password": "example-password",
    "isStaticIp": false,
    "staticIp": "",
    "netmask": "",
    "gateway": ""
  }
}
The current backend uses startDevice to leave its configuration loop. It does
not save the included fields, so configuration should be saved before starting.
| Payload example | Meaning |
|---|---|
{"pong":true} |
Response to a heartbeat ping. |
{"ssidArray":["Home WiFi","Office WiFi"]} |
Completed scan containing the discovered SSIDs. |
{"saveOk":true} |
Configuration was saved successfully. |
{"eraseOk":true} |
Saved configuration was erased. |
{"startDeviceOk":true} |
The device accepted the start command. |
{"testWifiStatus":"WL_CONNECTED"} |
Result of testing the saved WiFi configuration. |
testWifiStatus can contain:
| Status | Meaning |
|---|---|
WL_CONNECTED |
The device connected successfully. |
WL_NO_SSID_AVAIL |
The configured network could not be found. |
WL_CONNECT_FAILED |
The connection attempt failed. |
blankdevice |
No configuration has been saved yet. |
error |
The test timed out or returned another WiFi status. |