
A full-screen photo frame card for Home Assistant with smooth crossfades, clock overlay, and optional tap-to-view Lovelace dashboards. Integration with PulseOS adds live overlay, timers, and more.
- Smooth crossfades - Double-buffered image transitions with no white flash
- Clock overlay - Displays current time and date with automatic locale/timezone support
- Now Playing badge - Optional artist/title ribbon powered by any HA entity including Music Assistant when playing through a full media_player entity
- Tap-to-view dashboards - Configure Lovelace views in YAML and tap the photo to browse them with built-in navigation and auto-return
- Responsive design - Adapts to any (full) screen size with responsive typography (best when the dashboard is also using HACS kiosk_mode)
- PulseOS overlay embed - Automatically mirrors the kiosk-hosted overlay (multiple clocks, timers, alarms, notification bar, buttons) and falls back to the built-in clock if unreachable
I used ?disable_km in order to turn off kiosk mode so I could show a preview, but the card is best when paired with Kiosk Mode, so it ONLY shows a single photo—perfect as a photo library and burn-in preventer when your kiosk is idle.
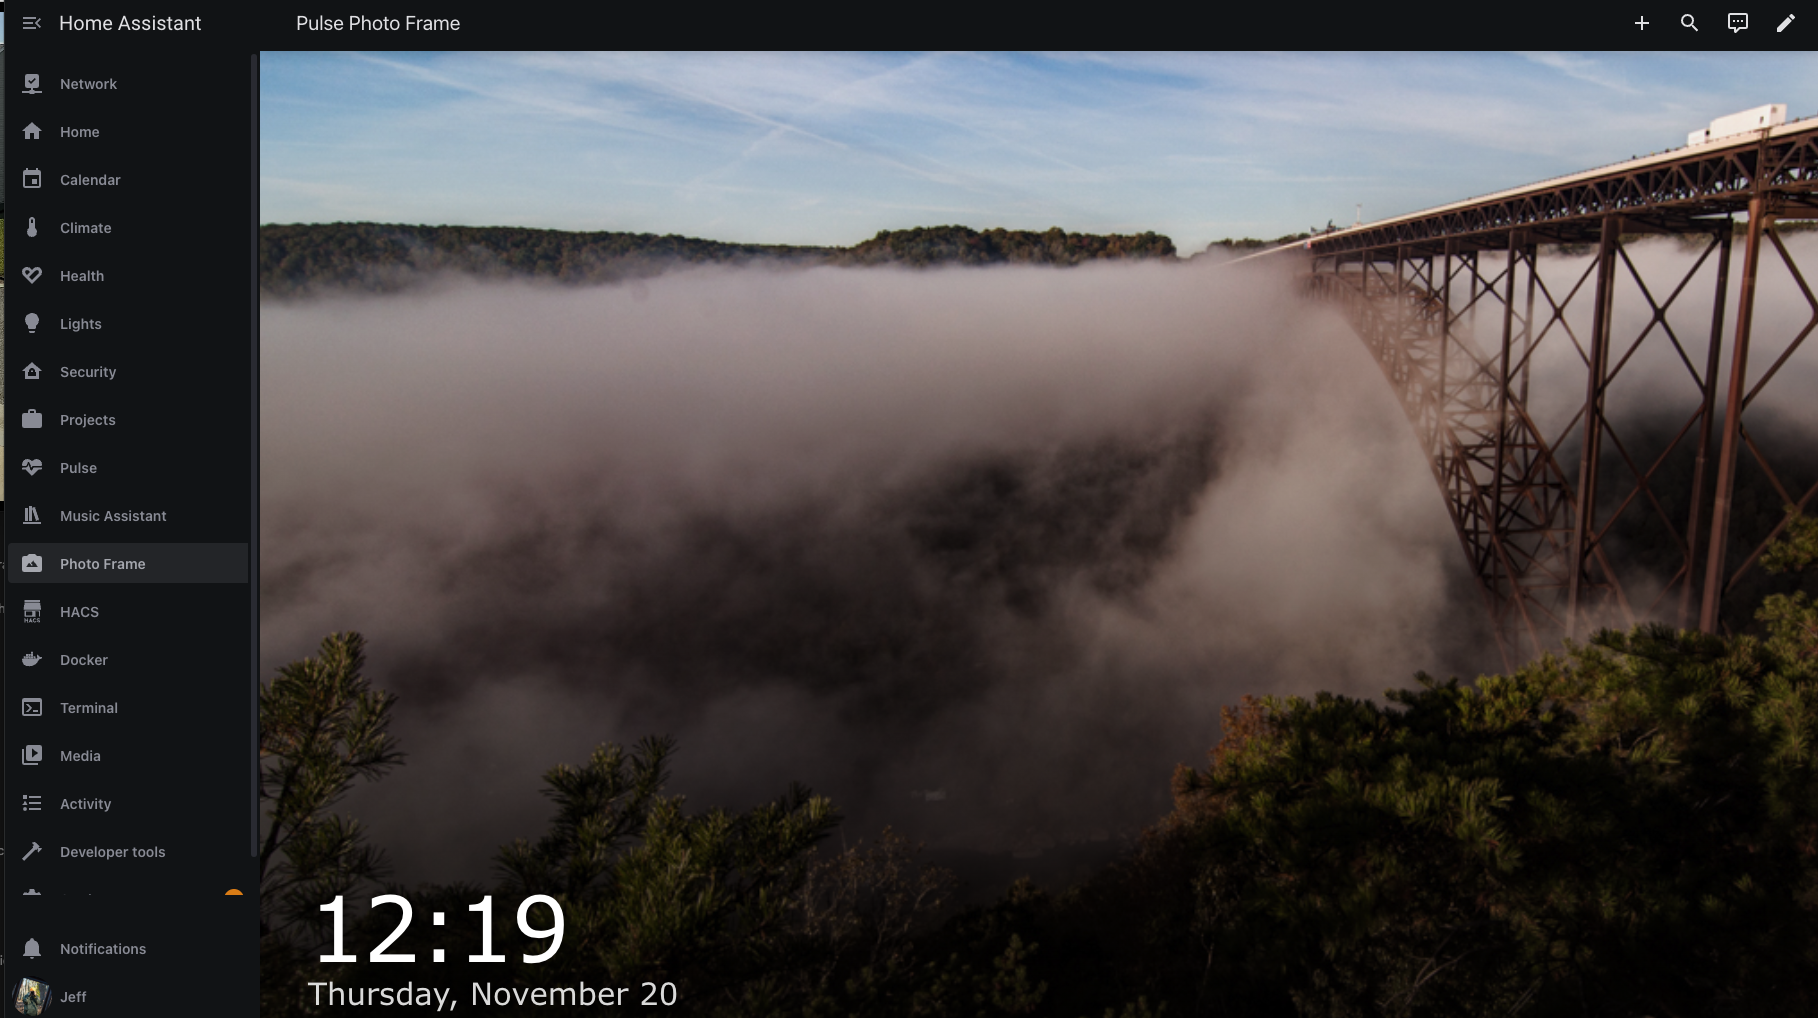
Even without PulseOS, this card gives you a smooth, full-screen slideshow: crossfades between
signed media-source URLs along with an optional customizable clock/Now Playing badge. Hook it up to any sensor that exposes a
JPEG/PNG path or media-source:// URL, and you instantly have a polished photo frame dashboard that keeps burning in at bay.
You still get:
- automatic fade transitions (
fade_ms) - a badge that follows
media_title/media_artistfrom any HA entity - the embedded clock/overlay when the kiosk integration isn’t available
Use the helper sensors below to control image selection, then point the card at sensor.pulse_current_photo_url
for a turnkey slideshow experience.
- In Home Assistant, go to HACS → Frontend → + Explore & Download Repositories
- Search for "Pulse Photo Card" or add this repository as a custom repository:
- Repository:
https://github.com/weirdtangent/pulse-photo-card - Category:
Plugin(Lovelace card)
- Repository:
- Click Download and restart Home Assistant
- The card will be automatically registered as a resource
- Download
pulse-photo-card.jsfrom this repository - Copy it to your Home Assistant
config/www/directory - In Home Assistant, go to Settings → Dashboards → ⋮ → Resources → + Add Resource:
- URL:
/local/pulse-photo-card.js?v=1 - Resource type:
JavaScript Module
- URL:
- Enable Advanced Mode in your HA profile (needed for the Resources menu if it's hidden)
Add these to your configuration.yaml to randomly select photos from your HA media source:
command_line:
  - sensor:
      name: Pulse Current Photo
      command: >
        find /media/Photos/Favorites -type f \( -iname '*.jpg' -o -iname '*.png' \) |
        shuf -n 1
      scan_interval: 60  # rotate new photo every 60 seconds, or change that timing here

template:
  - sensor:
      - name: Pulse Current Photo URL
        state: >
          {% set f = states('sensor.pulse_current_photo') %}
{{ 'media-source://media_source/local' + f[6:] if f.startswith('/media') else f }}scan_intervalcontrols how often the slideshow advances (seconds)- Adjust the path
/media/Photos/Favoritesto match your photo location - Use HA Settings | System | Storage to mount your photo library from your network
- The template converts file paths into
media-source://URLs for authenticated access
No personal library handy? Point the card at open-license collections instead. All of the APIs below deliver public-domain or CC0 media:
| Collection | License | API Docs |
|---|---|---|
| NASA Image & Video Library | U.S. public domain | https://images.nasa.gov/docs/images.nasa.gov_api_docs.pdf |
| NASA Astronomy Picture of the Day | U.S. public domain | https://api.nasa.gov/ |
| Smithsonian Open Access | CC0 (API key required) | https://edan.si.edu/openaccess/apidocs/ |
| The Metropolitan Museum of Art | CC0 | https://collectionapi.metmuseum.org/public/collection/v1/ |
| Art Institute of Chicago | CC0 | https://api.artic.edu/docs/ |
| Wikimedia Commons (Public Domain subset) | Mixed, filter to PD/CC0 | https://commons.wikimedia.org/wiki/Special:ApiSandbox |
Below are ready-to-paste Home Assistant snippets for the most popular feeds. Each request includes a User-Agent header so the CDNs don’t reject automation traffic.
NASA Image & Video Library (random topic)
Create an input_text helper named input_text.pulse_nasa_topic if you want to toggle the keyword from the UI; otherwise replace the helper reference with a literal string.
rest:
  - resource_template: >
      https://images-api.nasa.gov/search?q={{ states('input_text.pulse_nasa_topic') | default('nebula') | urlencode }}&media_type=image&page={{ range(1,5) | random }}
    headers:
      User-Agent: PulsePhotoCard/1.0 (Home Assistant)
    scan_interval: 900
    sensor:
      - name: pulse_nasa_photo_raw
        value_template: "{{ value_json.collection.version }}"
        json_attributes_path: "$.collection"
        json_attributes:
          - items

template:
  - sensor:
      - name: pulse_nasa_photo
        state: >
          {% set items = state_attr('sensor.pulse_nasa_photo_raw', 'items') or [] %}
          {% set pick = items | random if items else None %}
          {{ pick.links[0].href if pick else 'unknown' }}
        attributes:
          title: "{{ pick.data[0].title if pick else '' }}"
          photographer: "{{ pick.data[0].photographer | default('NASA') if pick else '' }}"
NASA APOD (single “photo of the day”)
rest:
  - resource: https://api.nasa.gov/planetary/apod?api_key=YOUR_KEY&thumbs=true
    headers:
      User-Agent: PulsePhotoCard/1.0 (Home Assistant)
    scan_interval: 21600
    sensor:
      - name: pulse_nasa_apod
        value_template: "{{ value_json.url }}"
        json_attributes:
          - title
          - explanation

template:
  - sensor:
      - name: pulse_nasa_apod_caption
        state: "{{ state_attr('sensor.pulse_nasa_apod', 'title') }}"
Smithsonian Open Access (API key required)
rest:
  - resource_template: >
      https://api.si.edu/openaccess/api/v1.0/search?q={{ states('input_text.pulse_smithsonian_topic') | default('space') | urlencode }}&media_type=Images&api_key=YOUR_KEY
    headers:
      User-Agent: PulsePhotoCard/1.0 (Home Assistant)
    scan_interval: 1800
    sensor:
      - name: pulse_smithsonian_photo
        value_template: >
          {% set rows = value_json.response.rows %}
          {% set pick = rows | random if rows else None %}
          {{ pick.content.descriptiveNonRepeating.online_media.media[0].content if pick else 'unknown' }}
        json_attributes:
          - response
The Metropolitan Museum of Art (curated object IDs)
rest:
  - resource: https://collectionapi.metmuseum.org/public/collection/v1/objects/436121
    headers:
      User-Agent: PulsePhotoCard/1.0 (Home Assistant)
    scan_interval: 7200
    sensor:
      - name: pulse_met_photo
        value_template: "{{ value_json.primaryImage or value_json.primaryImageSmall }}"
        json_attributes:
          - title
          - artistDisplayName
          - objectDate
Art Institute of Chicago (random result)
rest:
  - resource: https://api.artic.edu/api/v1/artworks/search?q=landscape&fields=id,title,image_id&limit=50
    headers:
      User-Agent: PulsePhotoCard/1.0 (Home Assistant)
    scan_interval: 3600
    sensor:
      - name: pulse_aic_photo
        value_template: >
          {% set data = value_json.data %}
          {% set pick = data | random if data else None %}
          {% set image_id = pick.image_id if pick else '' %}
          {{ 'https://www.artic.edu/iiif/2/' ~ image_id ~ '/full/843,/0/default.jpg' if image_id else 'unknown' }}
        json_attributes:
          - data
Point the card’s entity at whichever sensor you prefer (or wrap them in a template switcher) and you’ll have a rotating public collection without copying files into HA’s media folder.
Create a panel view that uses the custom card and your rotating photo URL sensor:
views:
  - title: Pulse Photo Frame
    path: photo-frame
    panel: true
    theme: midnight
    cards:
      - type: custom:pulse-photo-card
        entity: sensor.pulse_current_photo_url
        fade_ms: 2000              # optional, default 1000
        now_playing_entity: auto   # optional; follows sensor.<pulse_host>_now_playing
        show_overlay_status: true  # optional; set to false to hide the notification bar
Point now_playing_entity at any Home Assistant entity that exposes media_title / media_artist attributes (for example, Music Assistant or Snapcast media_player entities). You can also supply a sensor that already formats the text (the badge will show the sensor state whenever it isn't unknown/unavailable). Leave the option out entirely if you don't want a Now Playing pill.
Running a shared dashboard across multiple kiosks? Set now_playing_entity: auto and make sure each Pulse device appends ?pulse_host=<hostname> (PulseOS adds this automatically, see below). The card will look up sensor.<pulse_host>_now_playing, so every kiosk shows its own track without duplicating Lovelace YAML.
The card can switch from the photo screen into full Lovelace dashboards (“views”) whenever you tap the screen. Tap anywhere on the photo to jump to the first view, then use the navigation buttons in the nav bar (previous / home / next) to cycle through views or return to the photo. You can still tap an empty area in the view to return if there’s blank space, but the nav buttons are the primary control. An auto-return timer (view_timeout_seconds, default 180 s) snaps back to the photo automatically to prevent burn-in.
Design your dashboards in a normal HA view (sections/grid) and copy the YAML into the views: array. Once views are configured, the card renders them beneath the nav bar using Lovelace’s own card helpers—individual cards keep their styling, but the surrounding layout (column counts, grid spacing, stack widths) can still shift a bit because the kiosk view imposes different max widths and padding. If you absolutely need HA’s native renderer you can experiment with experimental_native_views: true, but that option remains unstable in kiosk setups (missing resources can still break rendering).
Example:
type: custom:pulse-photo-card
entity: sensor.pulse_current_photo_url
fade_ms: 2000
view_timeout_seconds: 240
views:
  - type: sections
    path: home-summary
    title: Home Summary
    max_columns: 2
    sections:
      - type: grid
        cards:
          - type: horizontal-stack
            cards:
              - type: weather-forecast
                entity: weather.forecast_home_2
              - type: custom:mini-graph-card
                name: WAN Internet Traffic (6h)
                entities:
                  - sensor.uni_gateway_max_house_network_rx
                  - sensor.uni_gateway_max_house_network_tx
          - type: horizontal-stack
            cards:
              - type: custom:mini-graph-card
                name: House Temperature (72h)
                entities:
                  - sensor.house_temperature
              - type: custom:mini-graph-card
                name: House Humidity (72h)
                entities:
                  - sensor.house_humidity
  - type: sections
    title: Current
    max_columns: 3
    sections:
      - type: grid
        cards:
          - type: vertical-stack
            cards:
              - type: custom:mushroom-title-card
                title: 🛰️ Network Dashboard
                subtitle: Status & Device Health
              - type: markdown
                content: |
                  {% set updates = states
                     | selectattr('entity_id','search','update\\.')
                     | selectattr('state','eq','on')
                     | map(attribute='name') | list %}
                  {% if updates %}
                  **Available updates:**
                  {% for item in updates %}
                  - {{ item }}
                  {% endfor %}
                  {% else %}
                  ✅ All up to date!
                  {% endif %}
          - type: vertical-stack
            cards:
              - type: custom:mushroom-title-card
                title: 🚨 Alerts & Health
              - type: conditional
                conditions:
                  - entity: update.home_assistant_core_update
                    state_not: "off"
                card:
                  type: custom:mushroom-entity-card
                  entity: update.home_assistant_core_update
Because the card re-renders these views internally, layouts stay consistent even in kiosk mode. If you absolutely need HA’s own renderer you can experiment with experimental_native_views: true, but that path remains experimental because some custom-card resources don’t load cleanly outside Lovelace.
PulseOS integration (optional)
PulseOS is aimed at makers building a desktop kiosk or assistant with a Pi 5 and Pi Touch 7" Display. Pairing this card with PulseOS turns it into a fully synced kiosk sidecar: you still get the standalone slideshow above, plus live overlay HTML, timers, alarms, notification badges, and button hooks that match what PulseOS is already showing. If you don’t run PulseOS, you can skip this section and keep using the card as-is.
When you do run PulseOS dashboards, Home Assistant must resolve the hostname that the kiosk
passes via ?pulse_host=<hostname> or the PULSE_HOST environment variable. Without that,
the overlay iframe and sensor.<pulse_host>_now_playing auto-detection break, even if the
kiosk itself can reach the host.
Make sure you:
- Add a proper DNS record (e.g., via your router, Pi-hole, AdGuard, or internal DNS)
- Or add a hosts entry on the HA host/container
- Or rely on mDNS/
.localresolution—the card now automatically tries<pulse_host>.localwhen the kiosk reports a bare hostname - Or set
PULSE_HOSTto an IP address instead of a hostname (less ideal, but works)
Once HA can resolve PULSE_HOST (or <pulse_host>.local), the overlay iframe and auto-entity features work reliably.
Quick test: open the Home Assistant Terminal & SSH add-on (or exec into the HA container/VM) and run ping <pulse_host> and ping <pulse_host>.local. If both fail to resolve, fix DNS/hosts or enable mDNS before continuing.
PulseOS 0.12+ exposes http://<pulse-host>:8800/overlay and an MQTT hint topic pulse/<host>/overlay/refresh. The card can embed that ready-made HTML in an <iframe> so timers, alarms, multi-clock layouts, notification badges, and Stop/Snooze buttons stay in perfect sync with the kiosk without reimplementing them in JavaScript.
-
Ensure your kiosk URL already includes
?pulse_host=<hostname>(PulseOS does this automatically). The card maps that hostname tohttp://<host>:8800/overlay, automatically appending.localwhen the host lacks a domain. -
Create an MQTT sensor (or any HA entity) that mirrors
pulse/<host>/overlay/refreshand name itsensor.<pulse_host>_overlay_refresh(e.g.,sensor.pulse_living_room_overlay_refresh). The card auto-detects that entity whenoverlay_refresh_entityis unset or"auto". Each JSON payload change re-fetches the overlay HTML. Example:mqtt: sensor: - name: "Pulse Living Overlay Refresh" state_topic: "pulse/living-room/overlay/refresh" value_template: "{{ value_json.version }}"
-
Optionally tighten
overlay_poll_seconds(default 120) for quicker safety refreshes.
If the overlay endpoint can’t be reached, the card automatically falls back to the built-in clock overlay so users still see the time.
PulseOS pairs nicely with HACS kiosk-mode (/hacs/repository/497319128), so the dashboard can stay truly fullscreen. Add a few kiosk-mode flags above your view YAML:
kiosk_mode:

  hide_header: true

  hide_sidebar: true

  force: true

views:

  - title: Pulse Photo Frame

    path: photo

    panel: true

    theme: midnight

    cards:

      - type: custom:pulse-photo-card

        entity: sensor.pulse_current_photo_url

        fade_ms: 2000

        overlay_refresh_entity: auto

        now_playing_entity: auto
Point PULSE_URL at the kiosk view (e.g., http://homeassistant.local:8123/pulse-home?sidebar=hide). PulseOS already adds ?pulse_host=<hostname> when launching dashboards, so each kiosk keeps its own overlay and Now Playing badge. Append ?disable_km to the URL while configuring if you need to expose the Lovelace edit/UI buttons again.
HA 2026.8+ note: new Home Assistant OS installs serve on port 80, so omit
:8123(e.g.http://homeassistant.local/pulse-home?sidebar=hide) if your instance uses the new default. Existing installs keep whatever port they already used.
| Option | Type | Default | Description |
|---|---|---|---|
entity |
string | required | Sensor entity that provides the image URL |
fade_ms |
number | 1000 |
Cross-fade transition duration in milliseconds |
now_playing_entity |
string | null |
Optional media_player/sensor entity for the badge. Set to "auto" to follow sensor.<pulse_host>_now_playing. |
now_playing_label |
string | "Now Playing" |
Overrides the label shown above the track text |
overlay_enabled |
bool | auto | Set to false to force the legacy overlay even if a kiosk overlay is available. Defaults to true when overlay_url resolves. |
overlay_url |
string | http://<pulse_host>:8800/overlay |
URL of the PulseOS overlay endpoint. Leave unset to auto-detect via ?pulse_host (the card auto-appends .local when the hostname lacks a domain). |
overlay_refresh_entity |
string | auto |
Optional HA entity (e.g., MQTT sensor) whose state changes when the kiosk publishes overlay refresh hints. Leave unset/"auto" to follow sensor.<pulse_host>_overlay_refresh; set a custom entity if you use a different naming pattern. |
overlay_poll_seconds |
number | 120 |
Fallback refresh cadence (seconds) if no refresh entity is configured or events are missed. Set to 0 to disable polling entirely. |
show_overlay_status |
bool | true |
Set to false to hide the Pulse/legacy overlay status pill (useful when you always run in legacy mode). |
views |
array | [] |
Optional Lovelace view definitions that the card can cycle through on tap. Copy/paste the YAML from any sections/grid/cards dashboard. |
view_timeout_seconds |
number | 180 |
How long to keep a view on screen before automatically returning to the photo. |
debug |
bool | false |
Set to true to enable verbose console logging. Useful when troubleshooting; otherwise the card only logs warnings/errors. |
PulseOS 0.12+ exposes a ready-to-render overlay at http://<pulse-host>:8800/overlay plus an MQTT hint topic pulse/<host>/overlay/refresh. The card can now embed that HTML in an <iframe> so timers, alarms, multi-clock layouts, notification badges, and Stop/Snooze buttons stay in perfect sync with the kiosk without reimplementing them in JavaScript. When a kiosk only reports a bare hostname (no dots), the card automatically tries the .local mDNS suffix so Home Assistant can still reach it.
Recommended setup:
-
Ensure your kiosk URL already includes
?pulse_host=<hostname>on the dashboard URL (PulseOS does this automatically). The card will map that hostname tohttp://<host>:8800/overlay, automatically appending.localwhenever the host lacks a domain segment. -
Create an MQTT sensor (or any HA entity) that mirrors
pulse/<host>/overlay/refreshand name itsensor.<pulse_host>_overlay_refresh(for example,sensor.pulse_living_room_overlay_refresh). The card auto-detects that entity wheneveroverlay_refresh_entityis unset or"auto". Each time the JSON payload changes, the card re-fetches the overlay HTML. Example:mqtt: sensor: - name: "Pulse Living Overlay Refresh" state_topic: "pulse/living-room/overlay/refresh" value_template: "{{ value_json.version }}"
-
Optionally tighten
overlay_poll_seconds(default 120) if you want a quicker safety refresh.
If the overlay endpoint can't be reached, the card automatically falls back to its legacy overlay so users still see the time.
- Black screen → The helper returned a path HA can't serve. Verify
sensor.pulse_current_photo_urllooks likemedia-source://media_source/local/.... If the source sensor is empty/unknown/unavailable (e.g. the photo folder is empty or unreadable), the card now shows a small on-screen notice explaining why and logs awarningto the HA system log (pulse-photo-card: no photo to display: …) instead of failing silently — check Settings → System → Logs or the Logbook for the reason. - Overlay iframe missing / Now Playing auto entity unavailable → Home Assistant can't resolve your
PULSE_HOST. Add a DNS/hosts entry or use an IP so the HA host can reach the overlay endpoint (the card already tries<pulse_host>.localwhen no domain is provided). - 401 Unauthorized in console → You're hitting
/local/...or added your own query parameters. Let the card resolve the media-source path; don't append cache busters, the signedauthSigalready handles caching. - Still using old JS → Bump the resource version (
/local/pulse-photo-card.js?v=2) or use Advanced Mode → Resources → Reload. - Clock not updating → Hard-refresh the dashboard (Cmd/Ctrl + Shift + R) after saving to ensure the browser loads the latest card code.
- Can't click the three-line menu / edit controls → Append
disable_km=1to your dashboard URL to temporarily disable kiosk-mode while editing, and addedit=1so Home Assistant exposes the editor pane. With both parameters set you can scroll down to the Edit button, kiosk-mode stays off, and the card automatically disables its tap overlay so nothing blocks the UI. For example:http://homeassistant.local:8123/dashboard-pulse/home?disable_km=1&edit=1.
The card CSS lives at the top of pulse-photo-card.js. You can customize:
- Fonts and typography
- Overlay gradients
- Clock positioning
- Add weather widgets or other overlays
This card was originally created for Pulse OS, a Raspberry Pi kiosk setup for Home Assistant. While it works great with Pulse devices, it's a standalone card that works with any Home Assistant installation.
MIT License - see LICENSE file for details.



